sales@nanyuetech.com WhatsApp: +86 139 0307 9263 Diseño 2D/3D gratuito
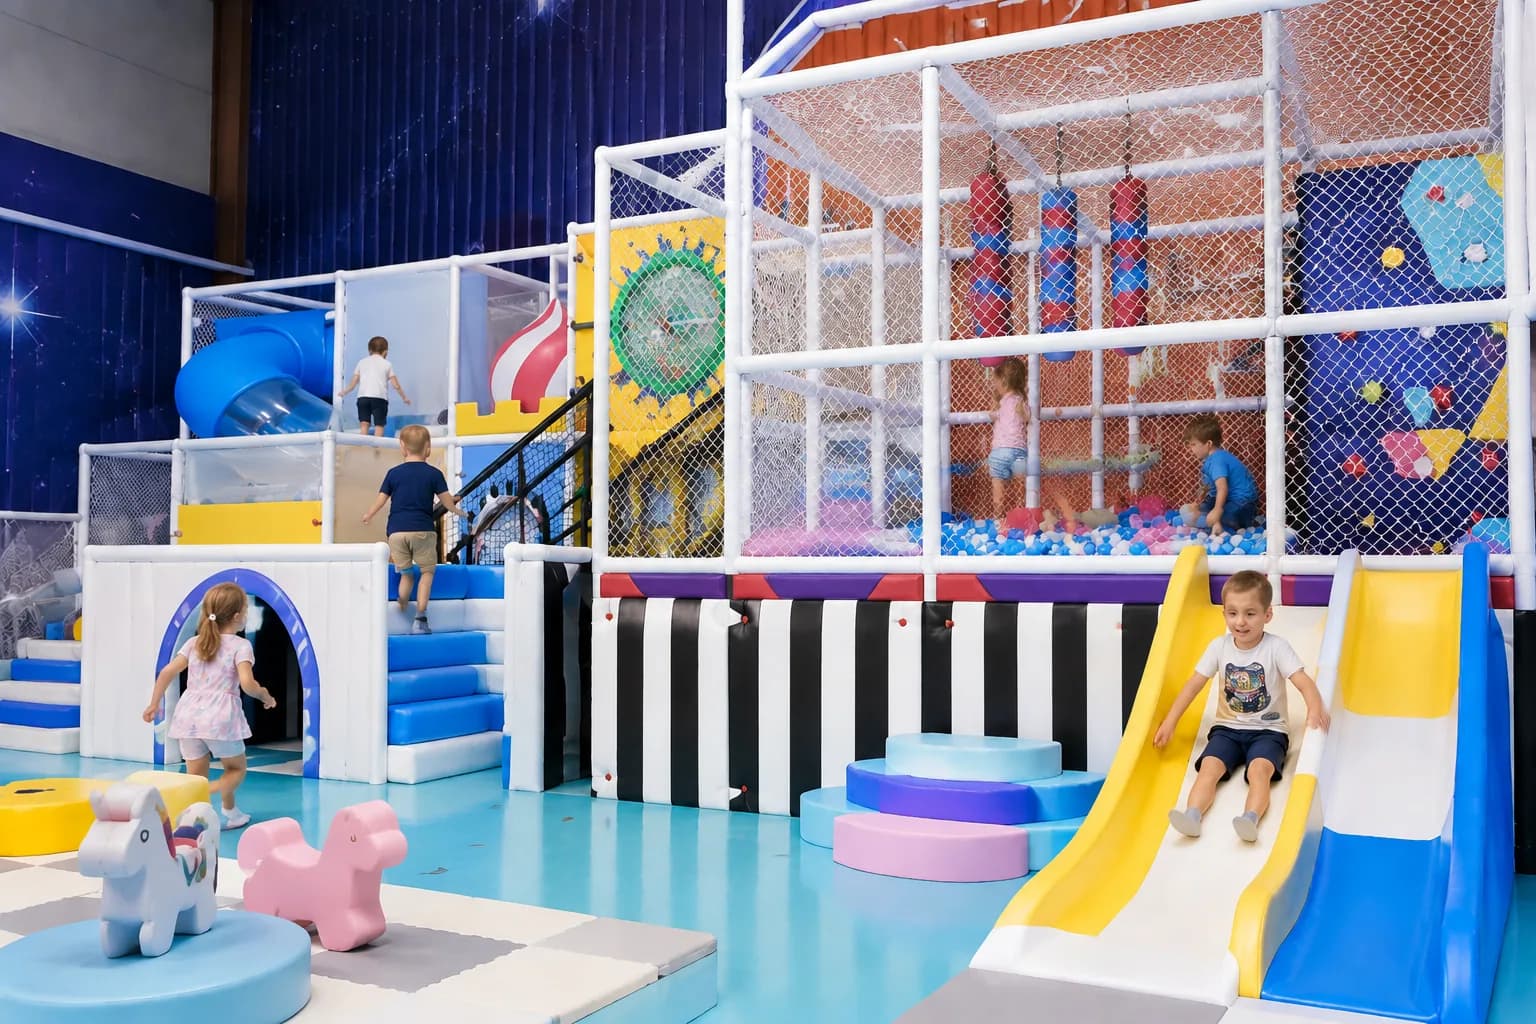
Commercial indoor playground with slides, climbing activities and soft play equipment
Commercial indoor playground equipment prepared for active play.

Installation Support Built Around Your Project

Installation support is coordinated around the approved equipment configuration, site information and responsibilities agreed for the project.

01

Project-Specific Drawings

Installation information is prepared around the approved playground design.

02

Factory Preparation

Selected components can be checked and prepared before shipment.

03

Installation Guidance

Project-specific support is available according to the agreed installation scope.
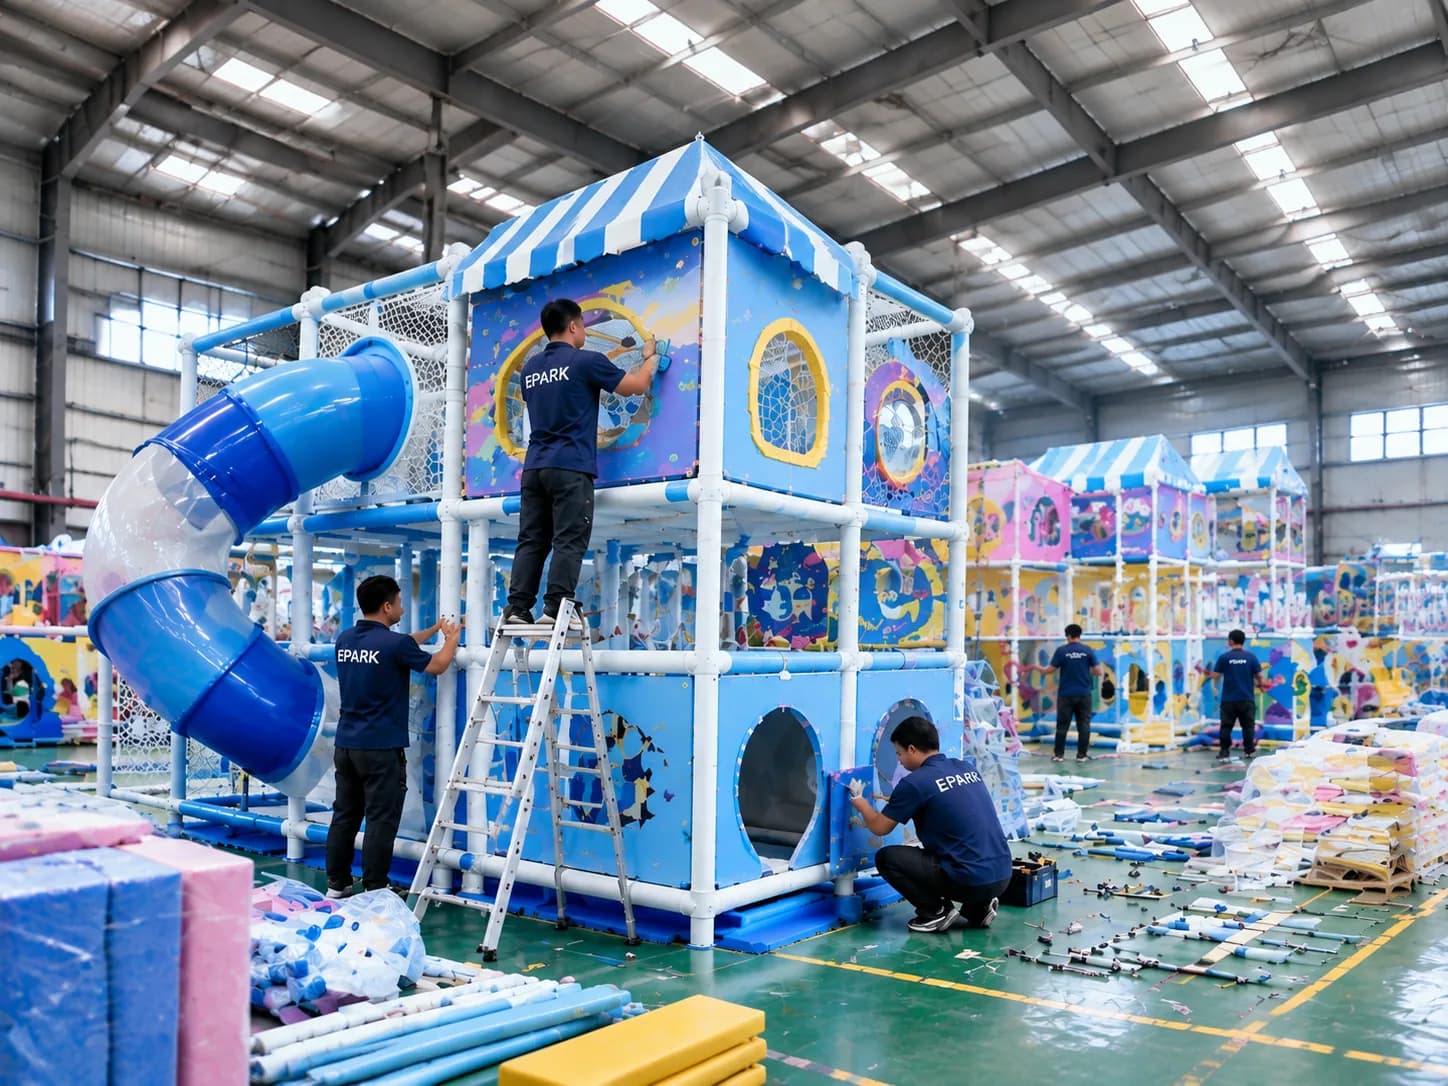
EPARK team preparing and assembling indoor playground equipment before shipment
Indoor playground preparation and assembly before shipment.

How EPARK Prepares Before Shipment

Selected components can be trial assembled and checked before shipment according to the approved project scope.

Component Preparation

Components are organized around the approved project drawing references.

Factory Assembly

Selected structures may be assembled for checking when included in the confirmed scope.

Quality Check

Visible components and project references are checked before packing.

Packing Preparation

Prepared components are organized for the agreed shipment plan.

Preparation activities vary by project. A complete trial assembly is not assumed unless it is included in the confirmed scope.
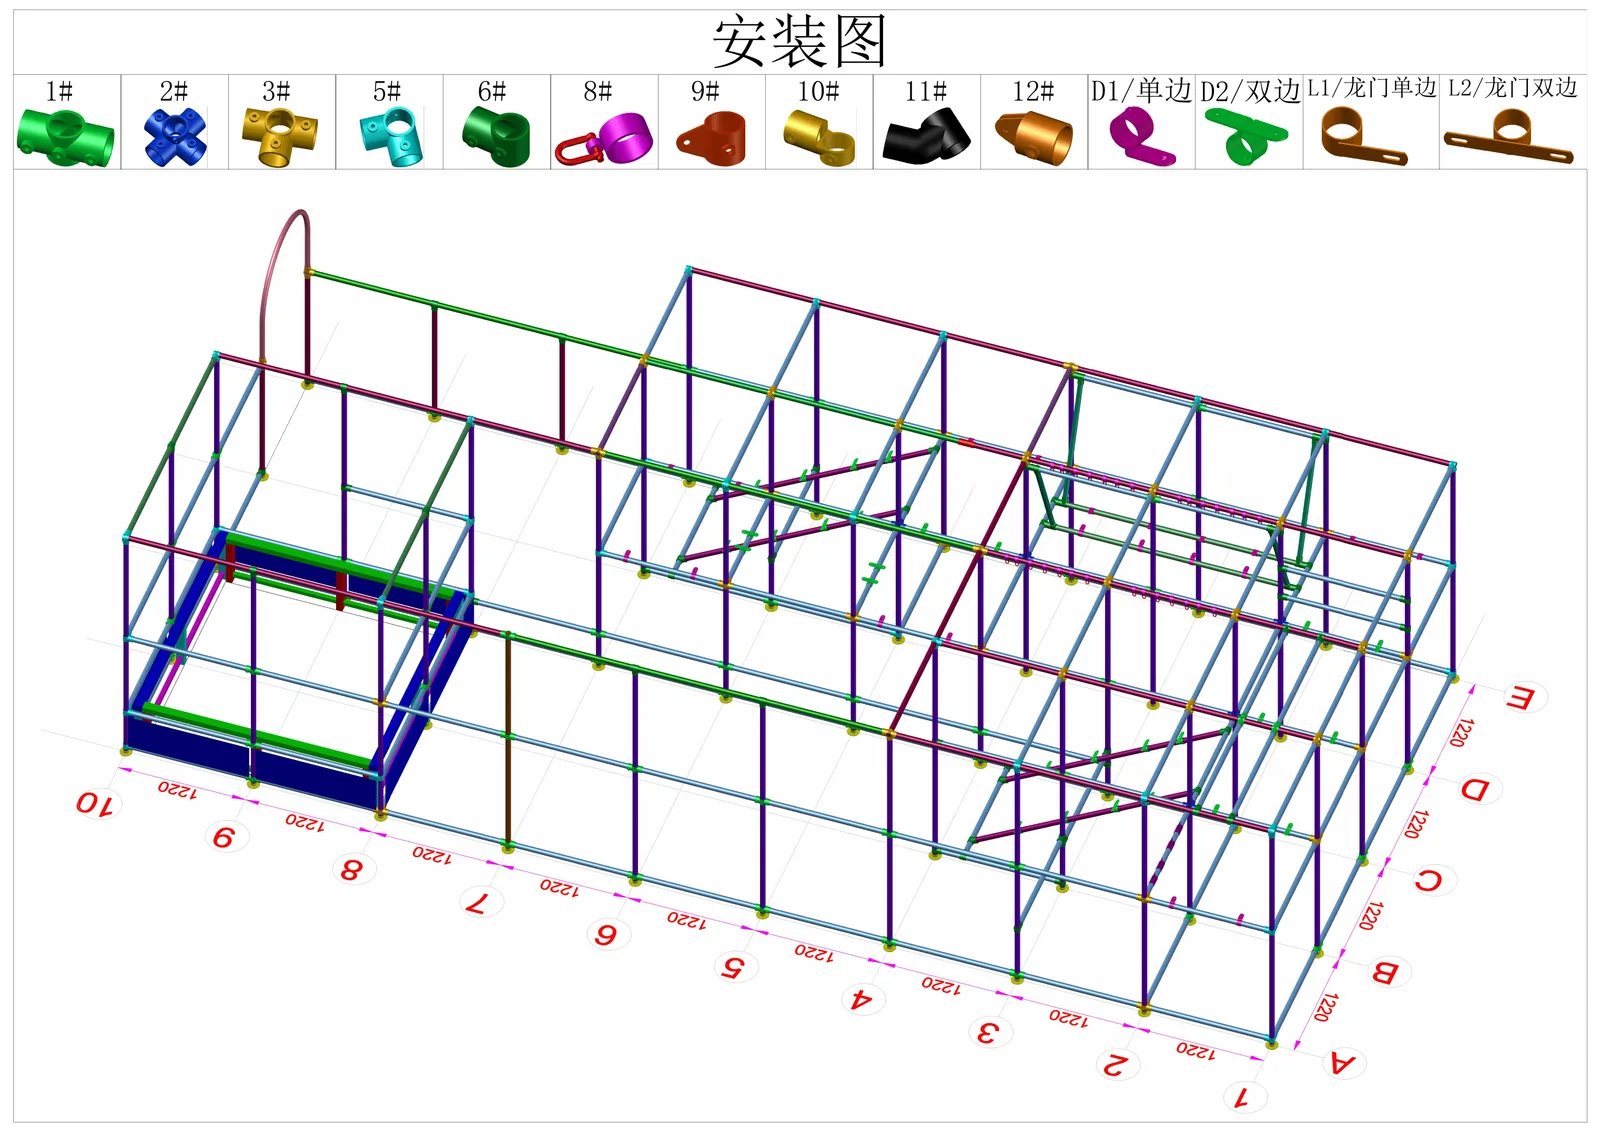
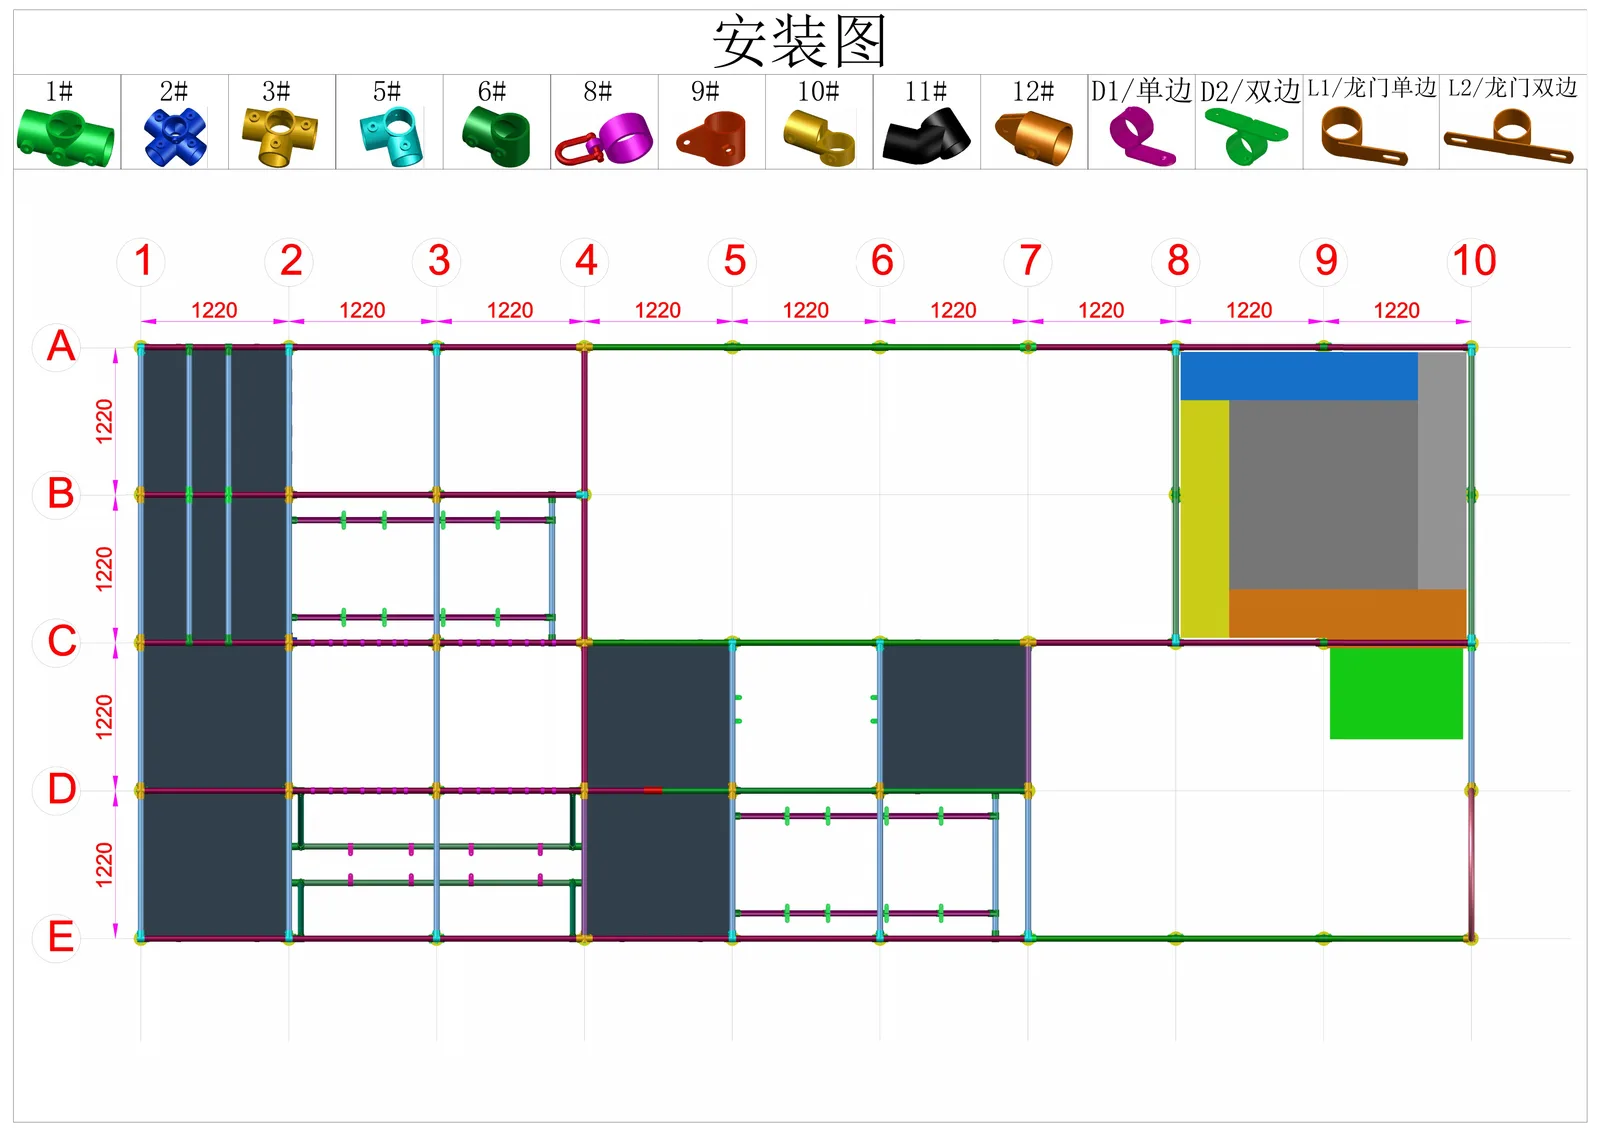
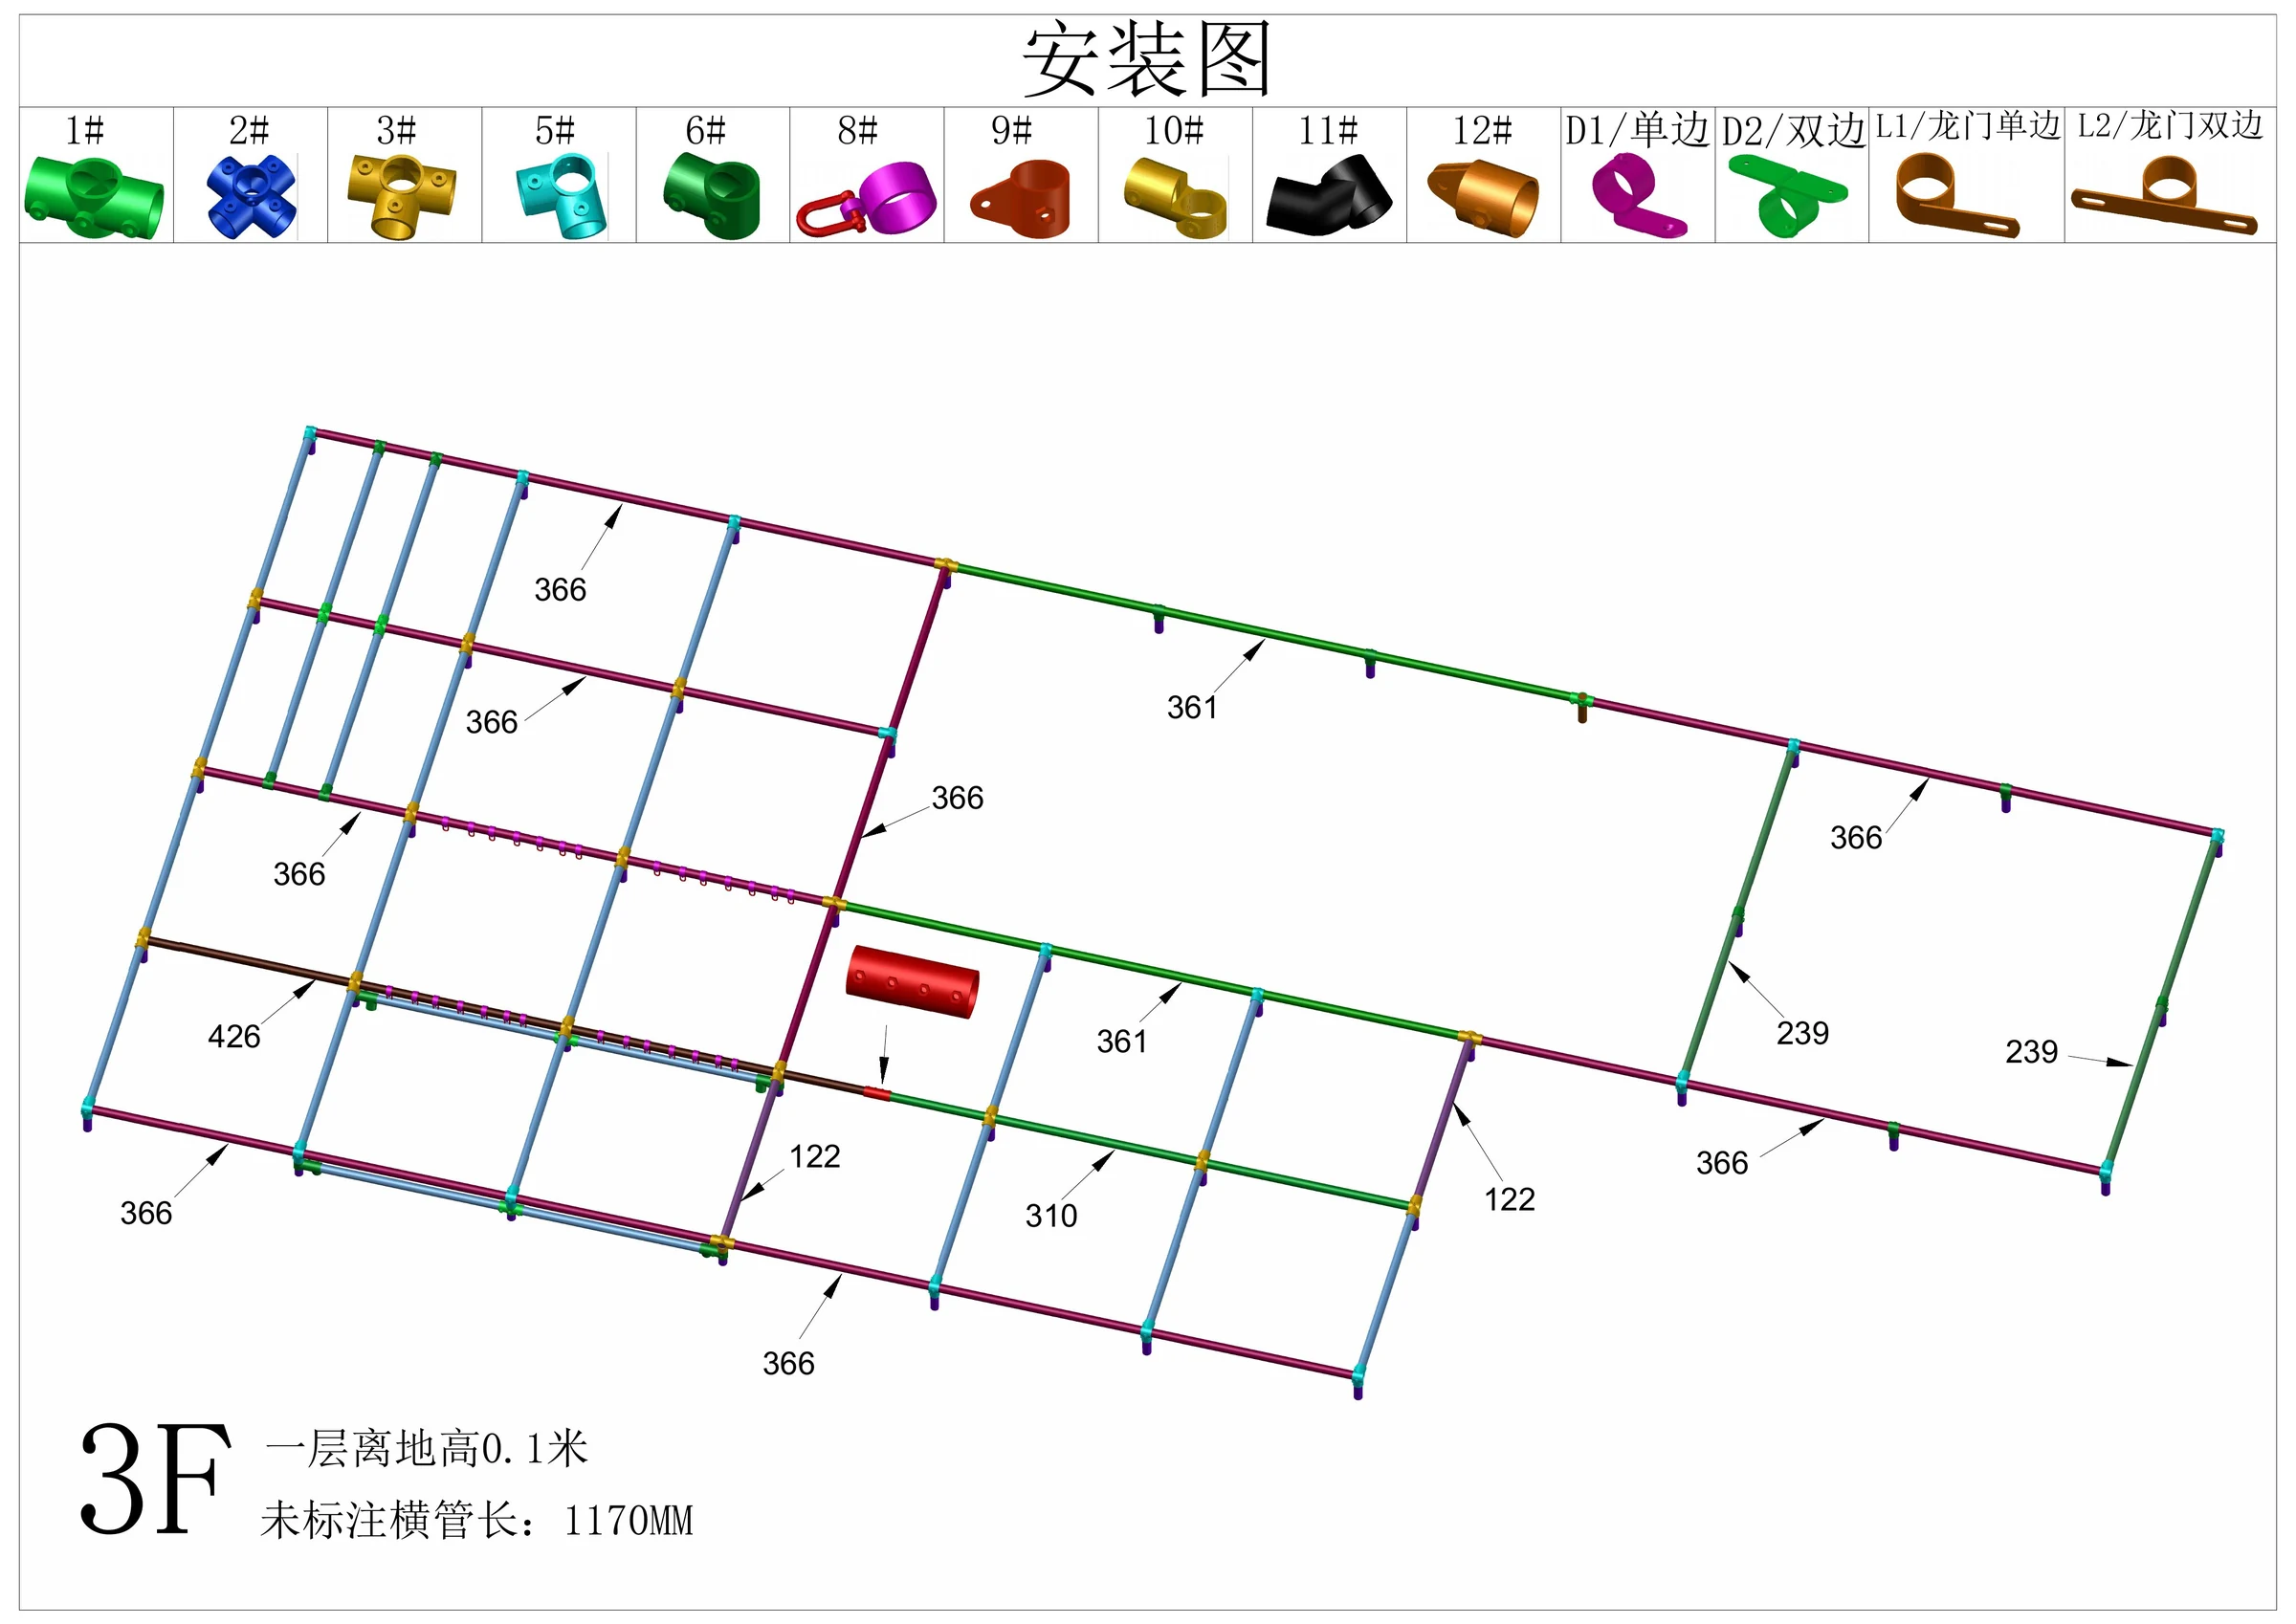
EPARK project-specific indoor playground frame assembly drawing
Frame positions and assembly references from the original EPARK PDF.
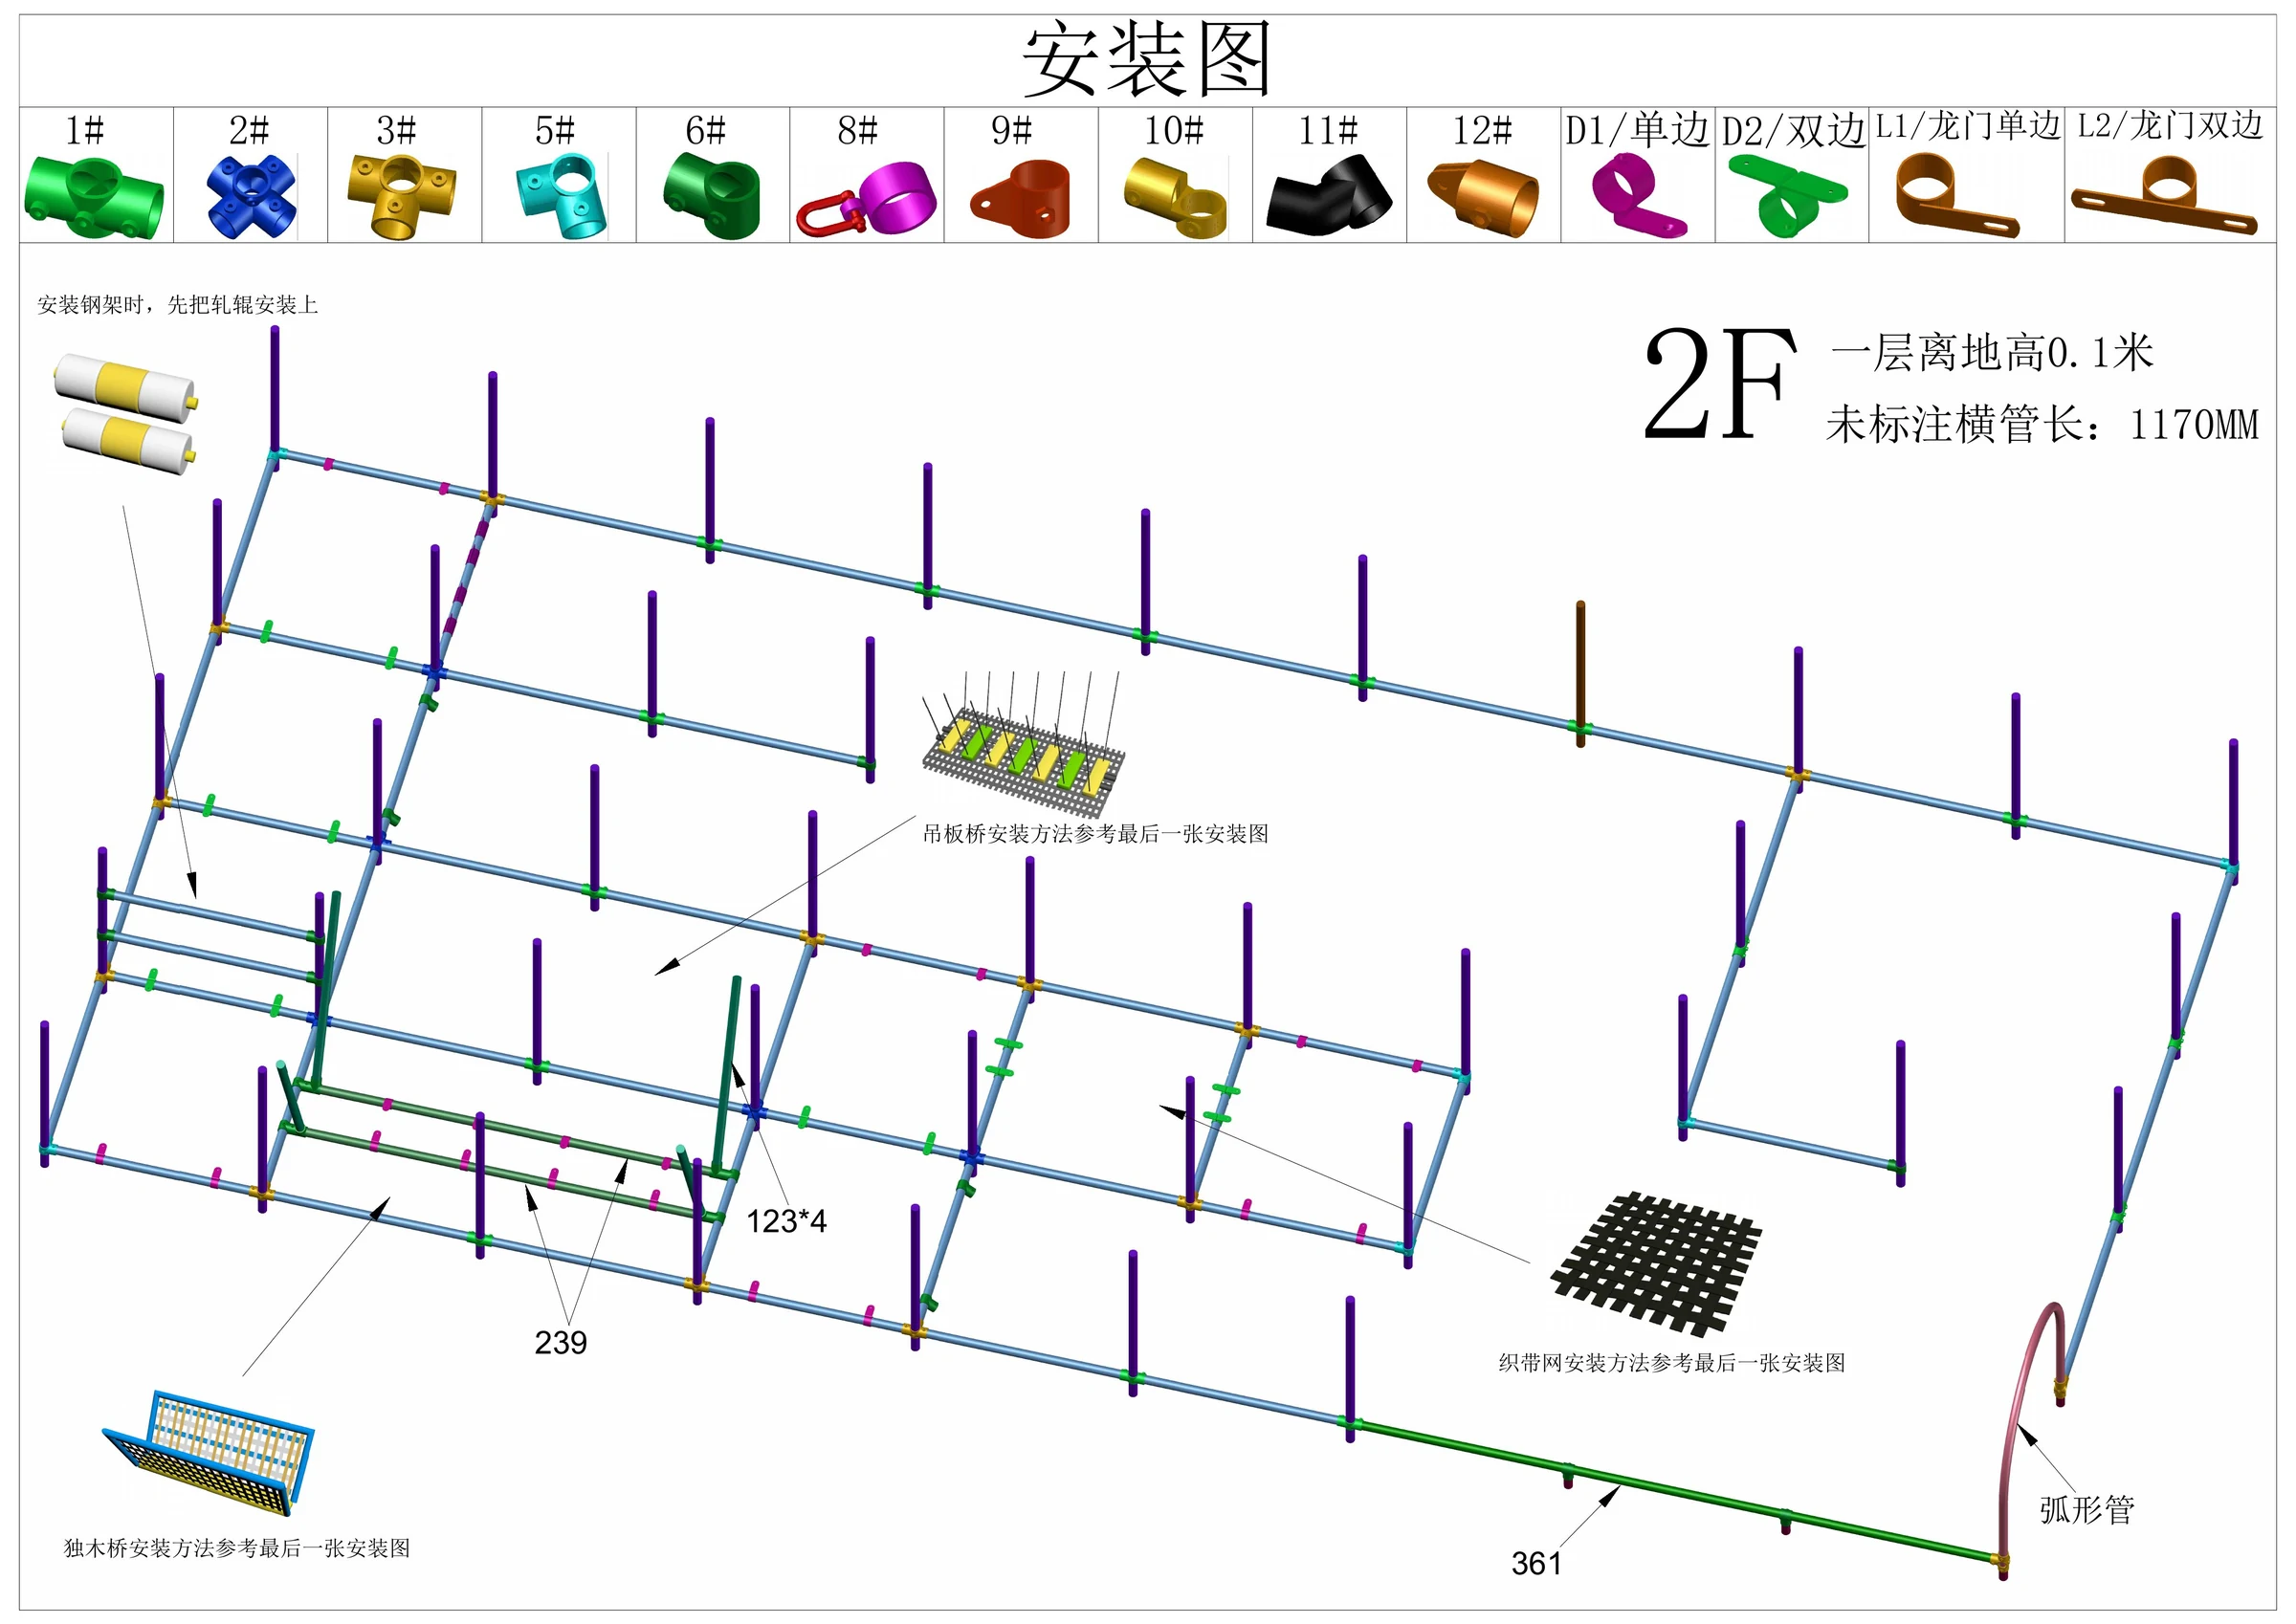
EPARK installation drawing showing grid positions and component references
Grid positions, structural references and connector types.
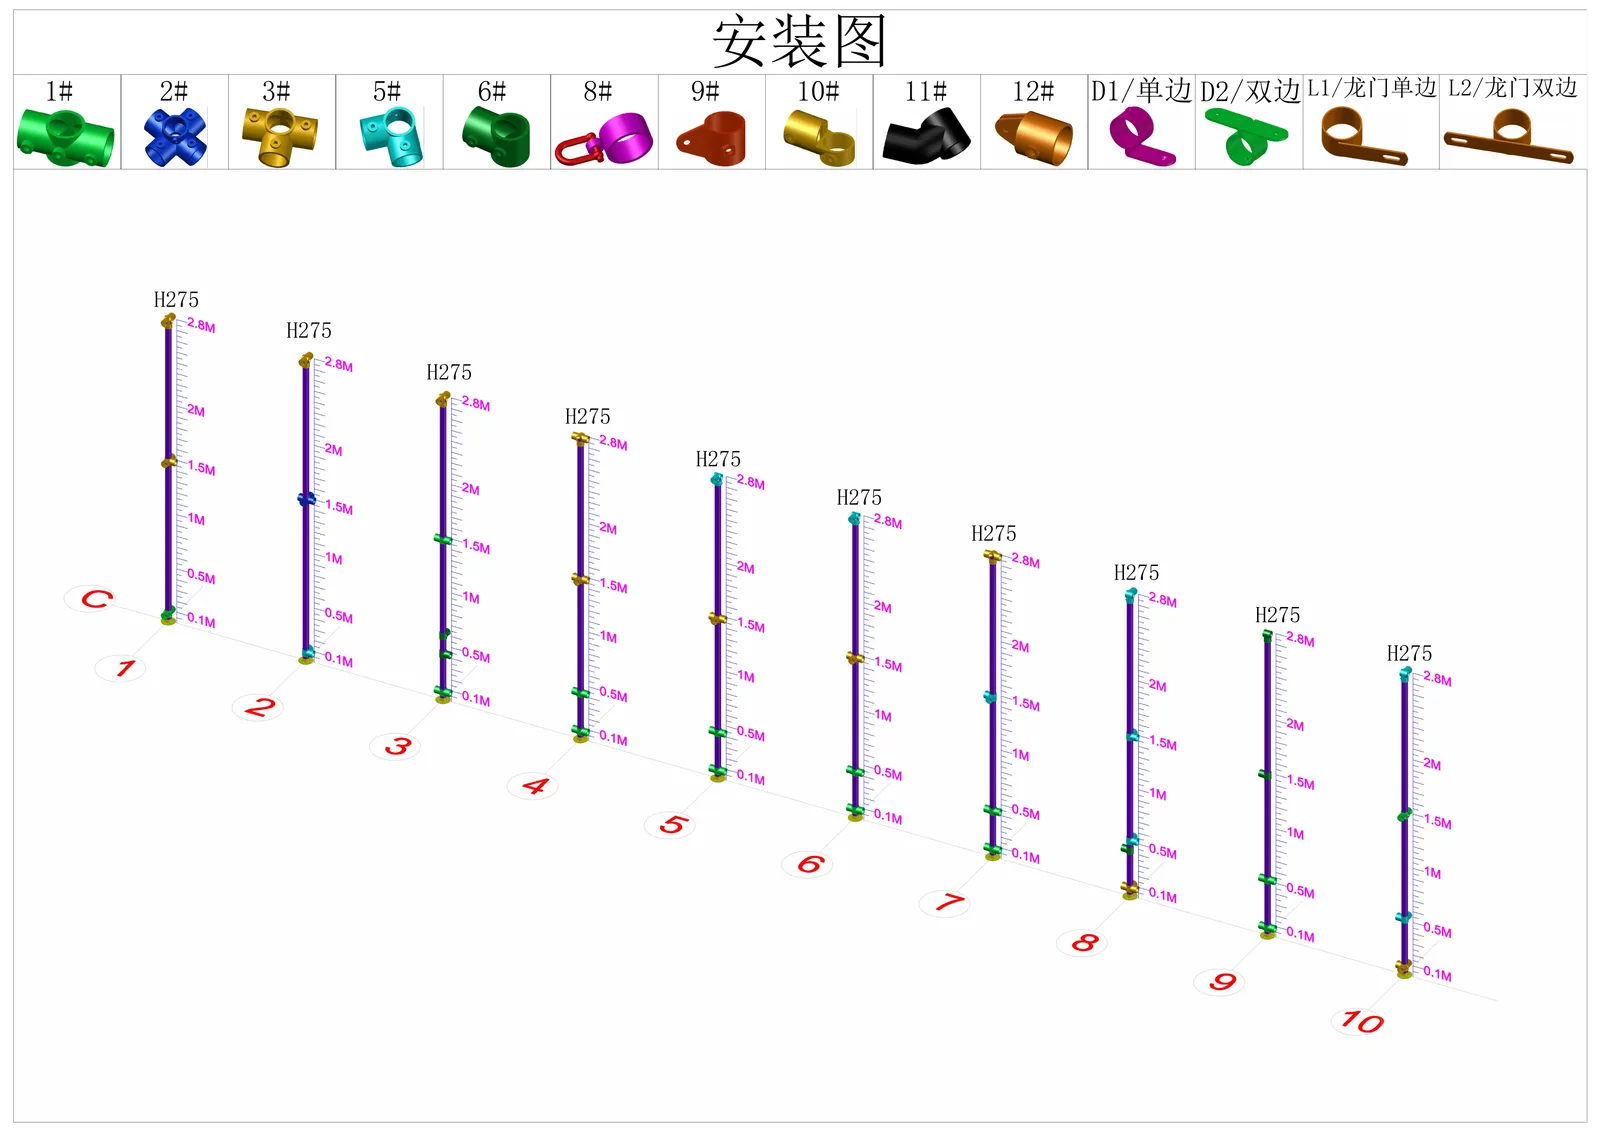
EPARK installation drawing showing numbered vertical frame components
Component numbering and vertical frame references.

Project-Specific Installation Drawings

The previews shown here are extracted from a real EPARK project drawing set. Dimensions, part references and assembly details apply only to the project documented in that PDF.

  • Component numbering
  • Assembly references
  • Structural positions
  • Installation sequence references
View Installation Manual
How to Assemble an Indoor Playground

Indoor Playground Installation Guide

View Full Installation Manual

This web guide organizes real drawings from the available EPARK project manual into readable assembly stages. It does not replace the project-specific PDF: all dimensions, component numbers and technical requirements must be checked against the approved document for the actual project.

  1. STEP 01

    Assemble the Frame

    Prepare the installation area, identify the numbered vertical pipes and build the main structural frame in the positions shown on the approved project drawing.
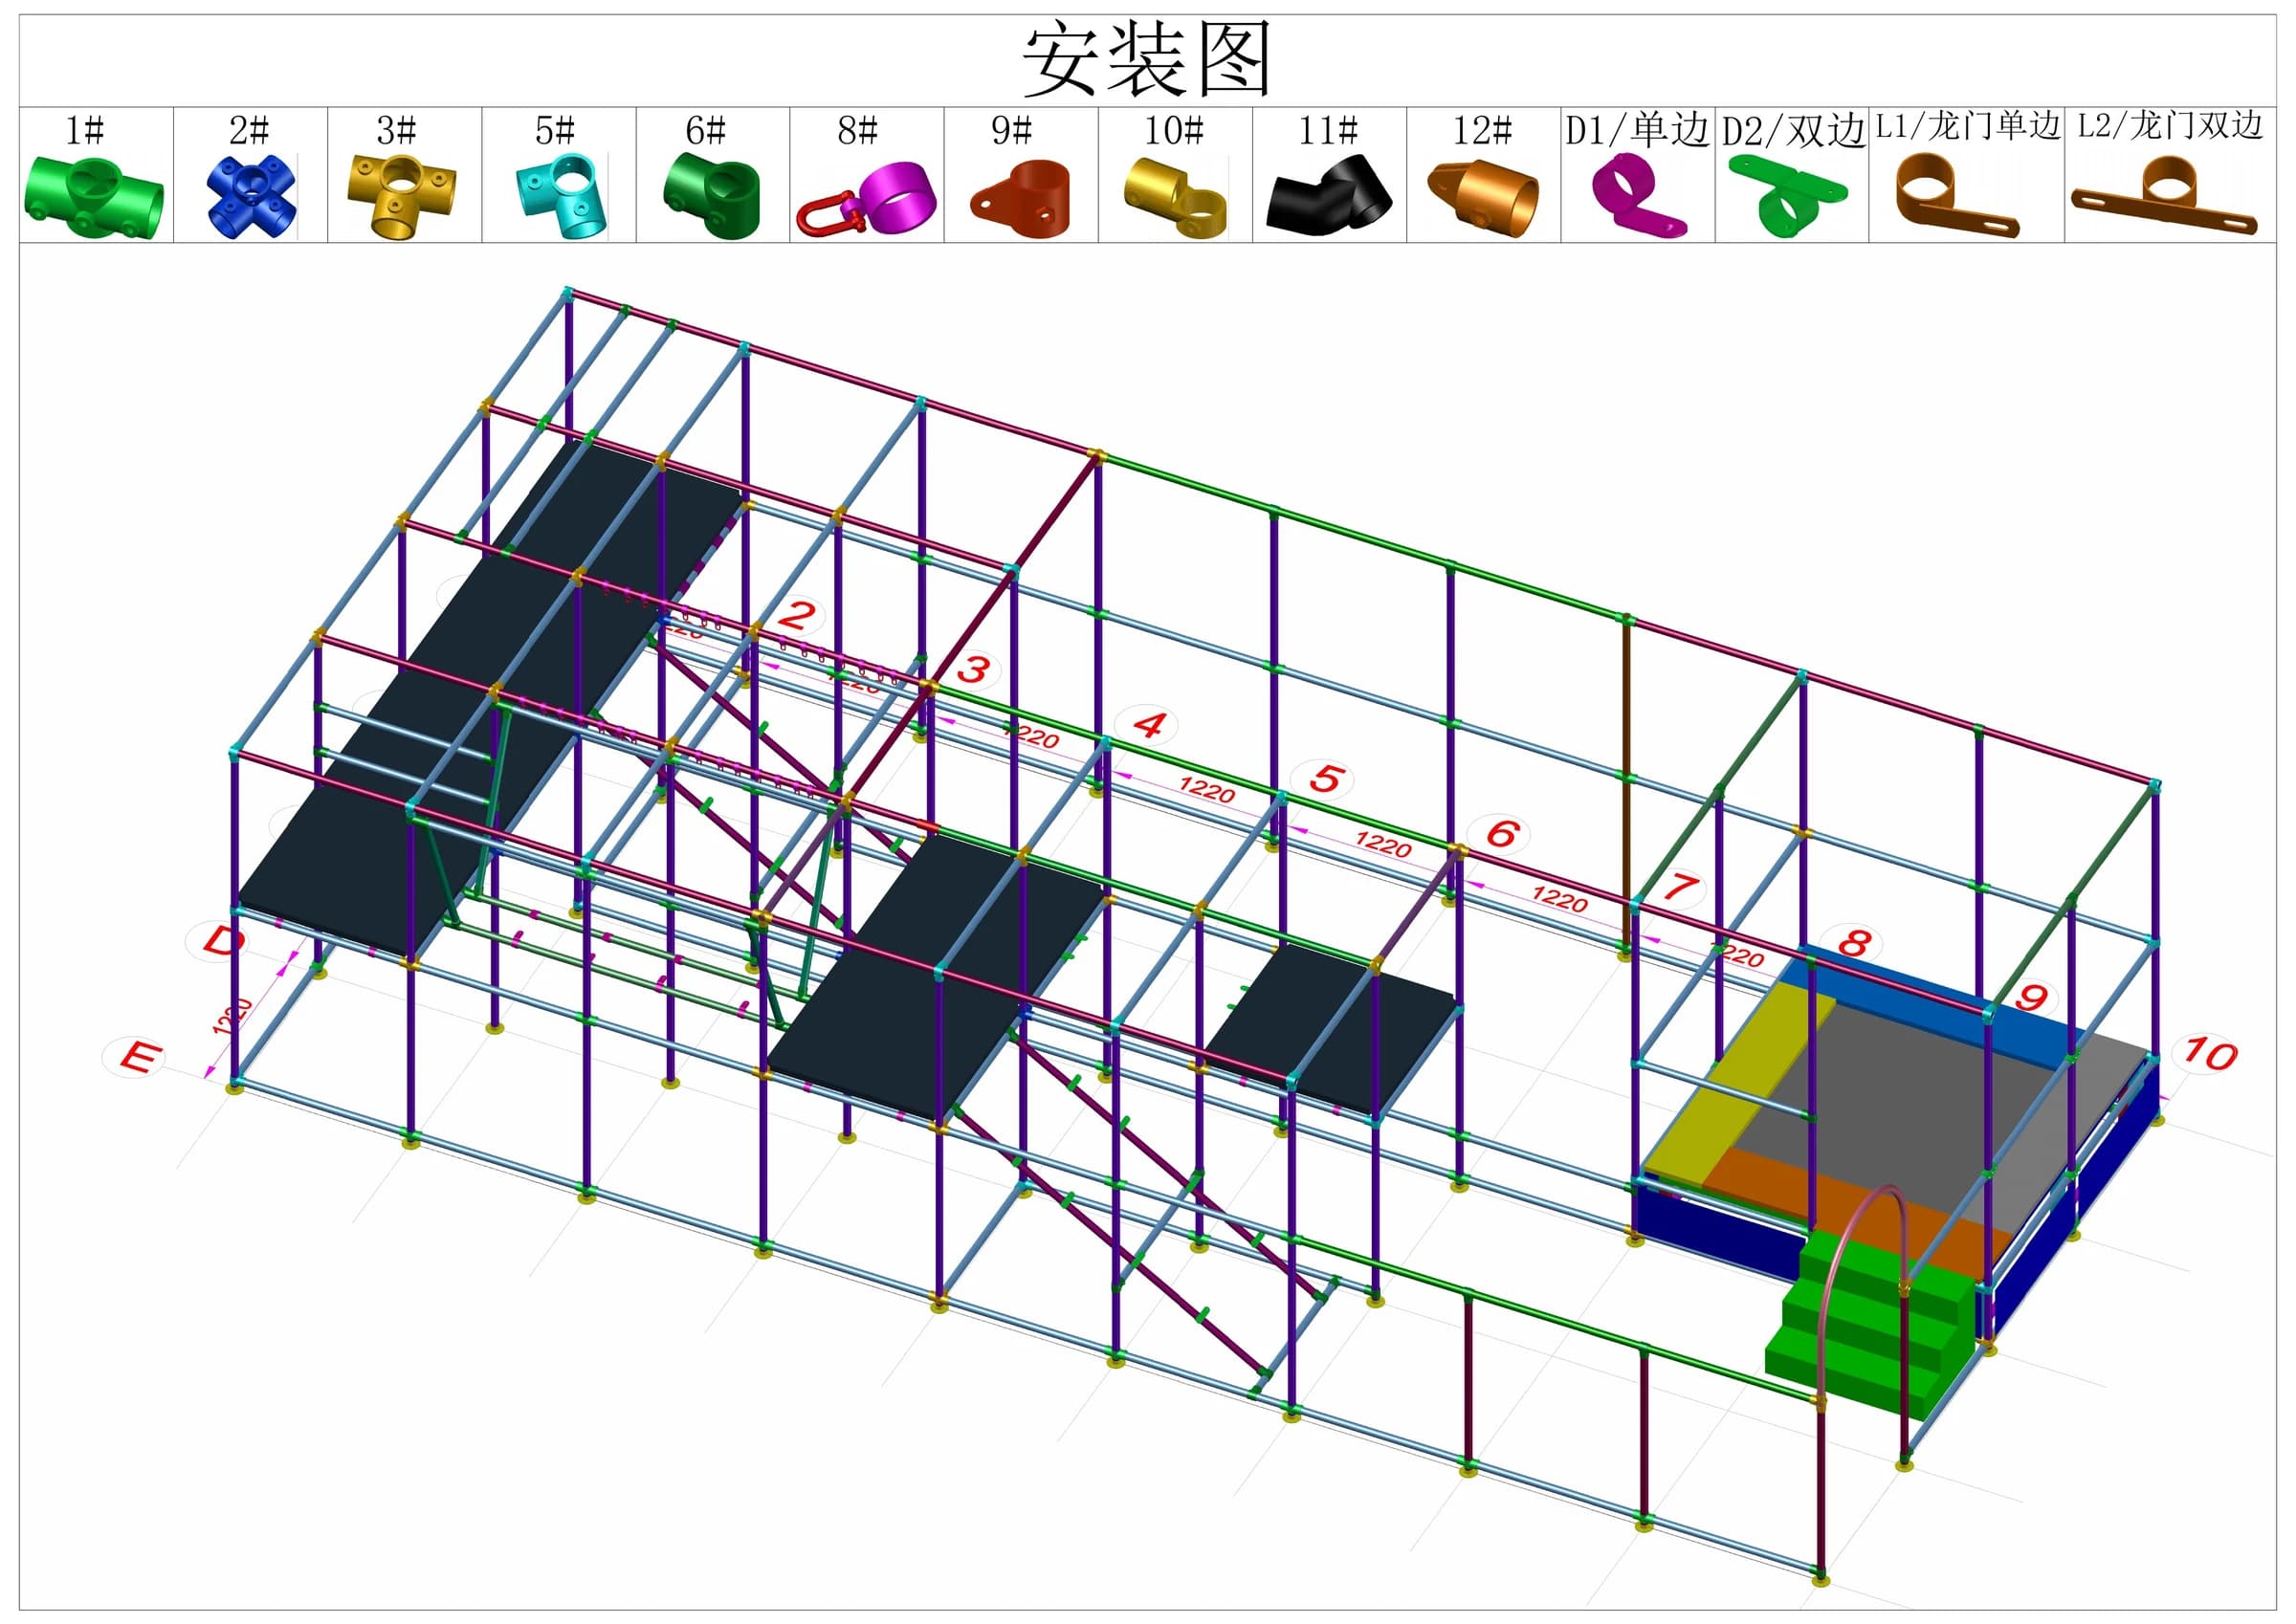
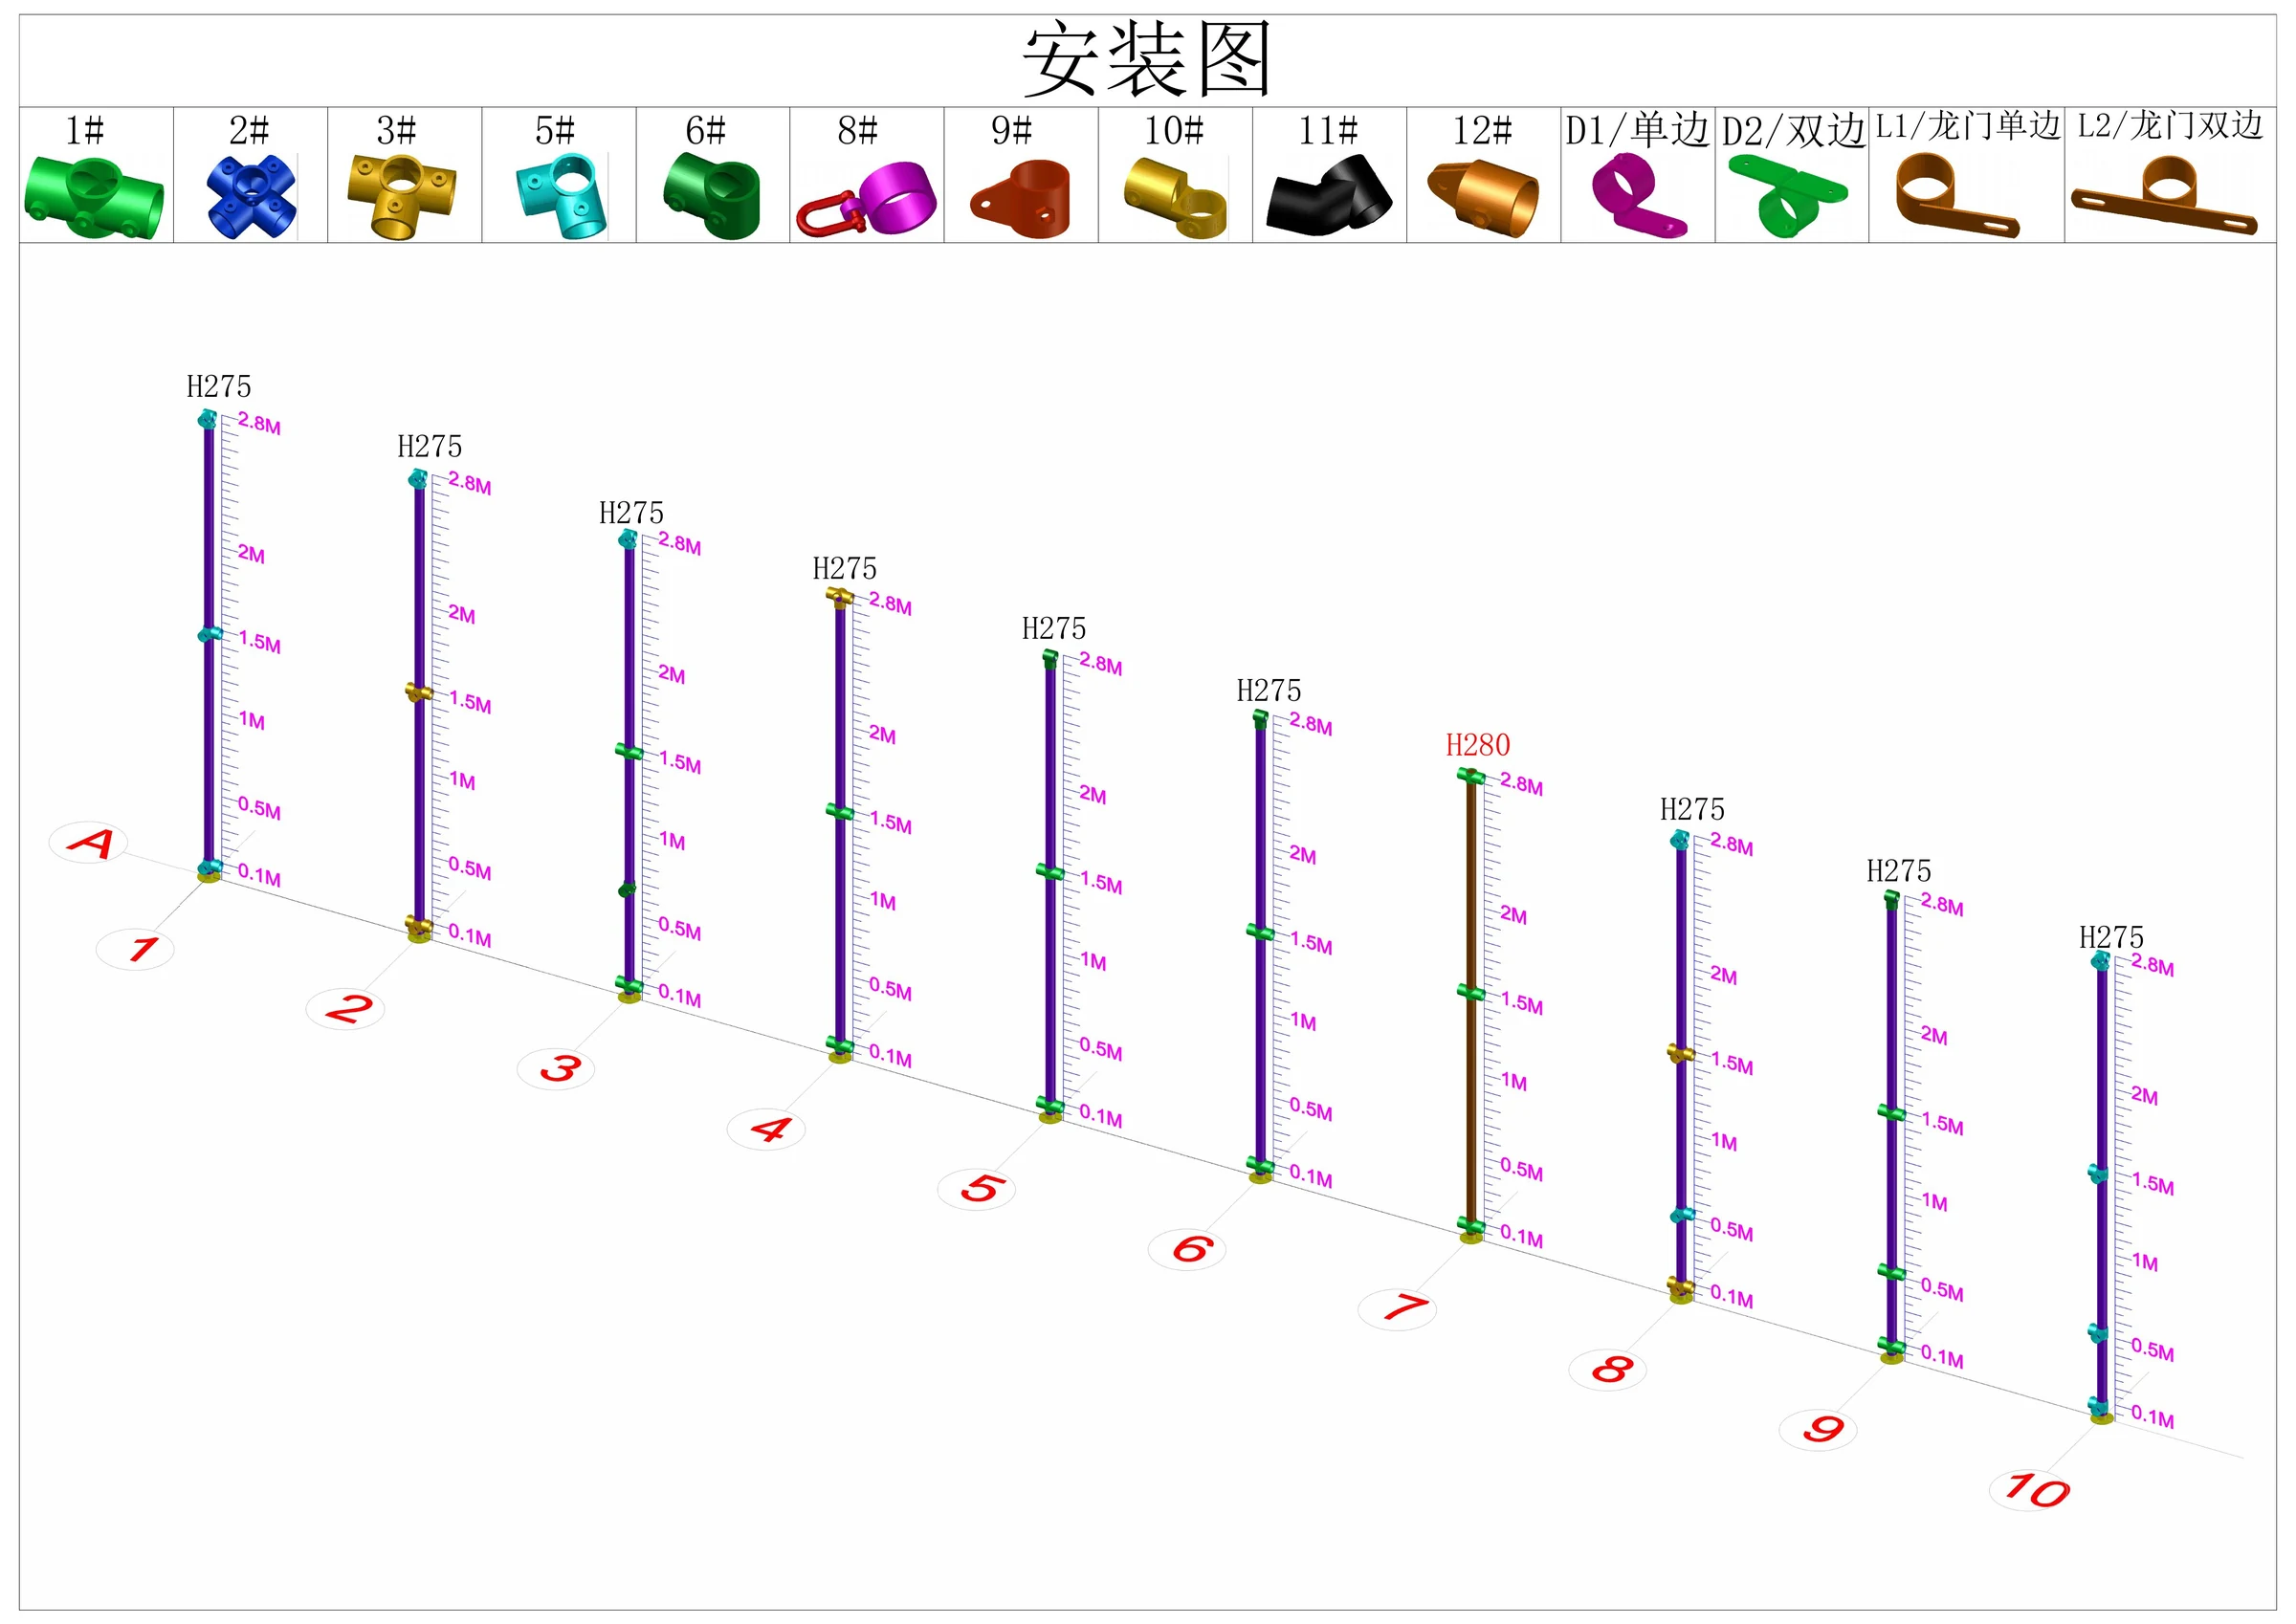
    • Confirm the usable floor area and prepare any approved EVA mat or soft pad required for the project.
    • Start with the vertical pipes and identify each position from the drawing grid and component numbering.
    • Connect the horizontal pipes and specified connectors only in the locations shown in the project document.
    • Continue the upper-level structure from the matching floor references, keeping fasteners and components organized by drawing number.
    indoor playground frame assembly installation guide
    Main structural frame, numbered grid positions and connection references from the original EPARK drawing.
    indoor playground vertical pipe numbering installation drawing
    Vertical-pipe identification, connector types and installation heights shown in the project document.
    indoor playground upper level frame assembly guide
    Upper-level layout with structural members and component references from the real EPARK project manual.
    indoor playground third level frame installation drawing
    Upper structural section with individual pipe references for installation coordination.
  2. STEP 02

    Assemble Playground Accessories

    Continue the structural assembly with the platform locations and support frames required for the play components shown in the approved layout.
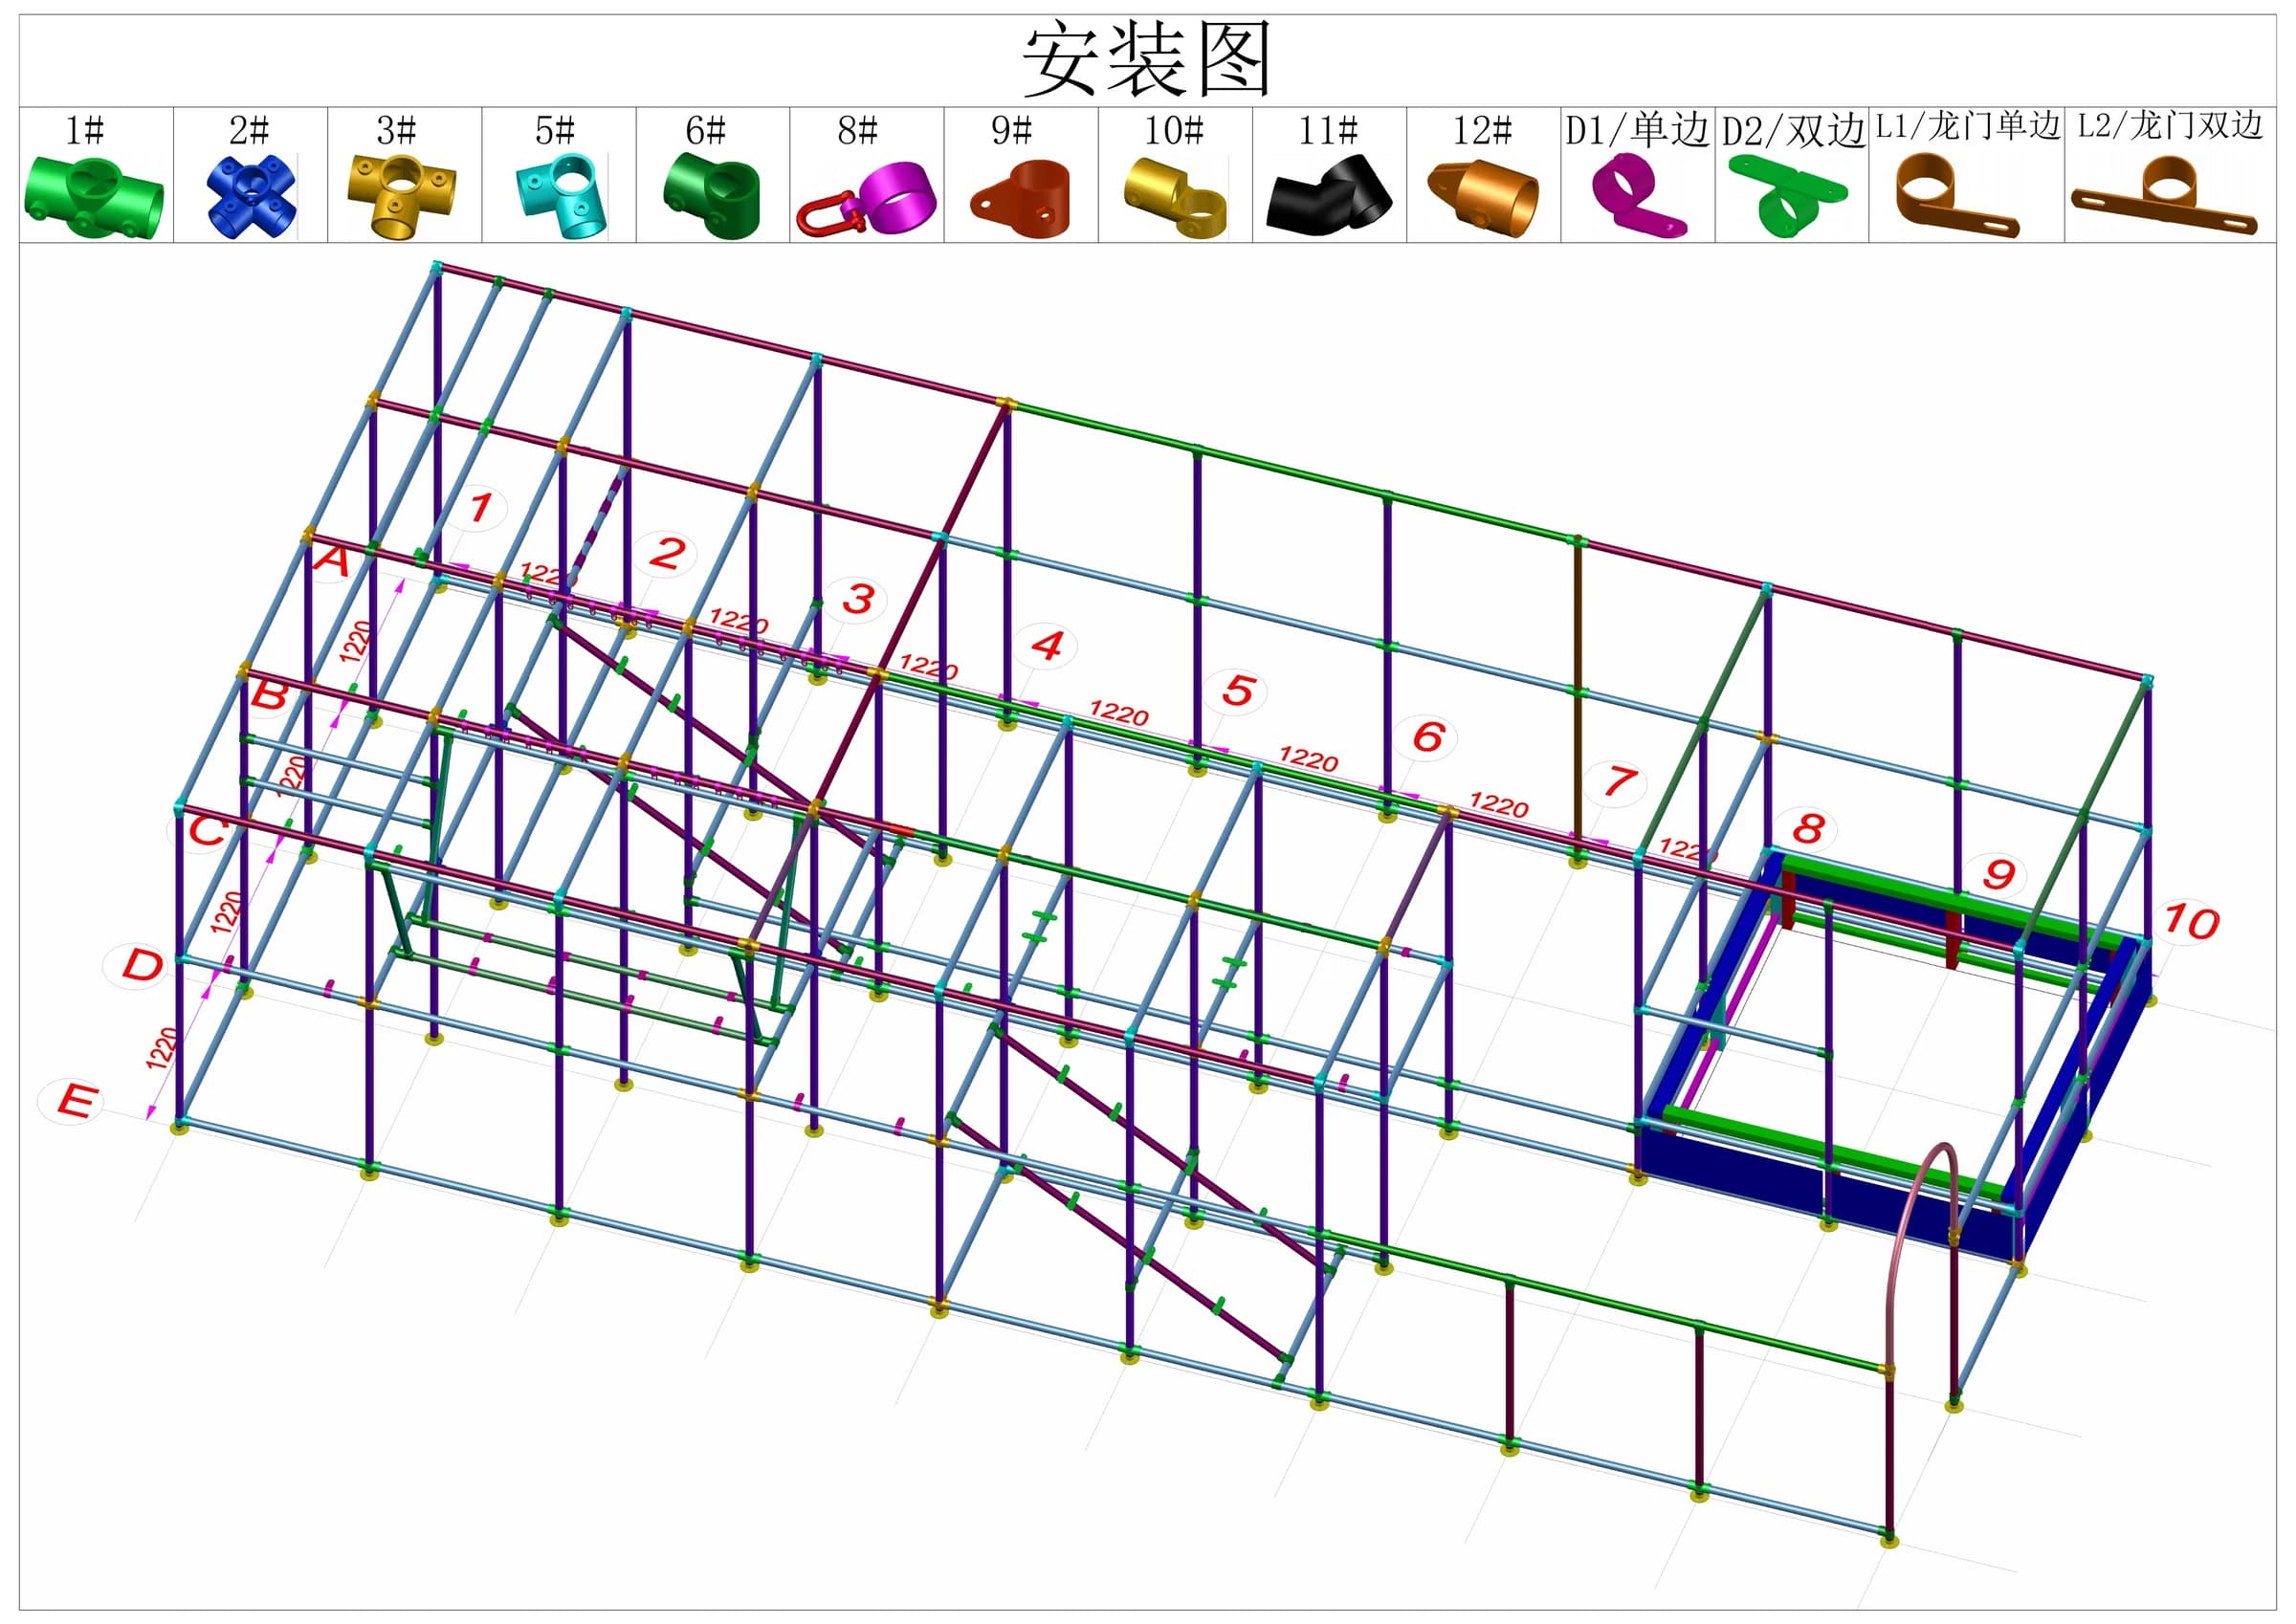
    • Use the numbered grid and pipe references to locate platform and accessory support positions.
    • Follow the drawing sequence as additional horizontal members and bracing are connected to the main frame.
    • Mount supplied play elements only at the connection points shown in the approved project drawings.
    • Slides, tunnels, bridges, climbing elements and other activities vary by project and must follow their matching document references.
    indoor playground accessory installation drawing
    Platform positions and accessory support structures shown within the numbered frame grid.
  3. STEP 03

    Install Nets and Remaining Accessories

    Complete the documented netting and bridge-related elements after the supporting structure is ready, using the installation references provided for the project.
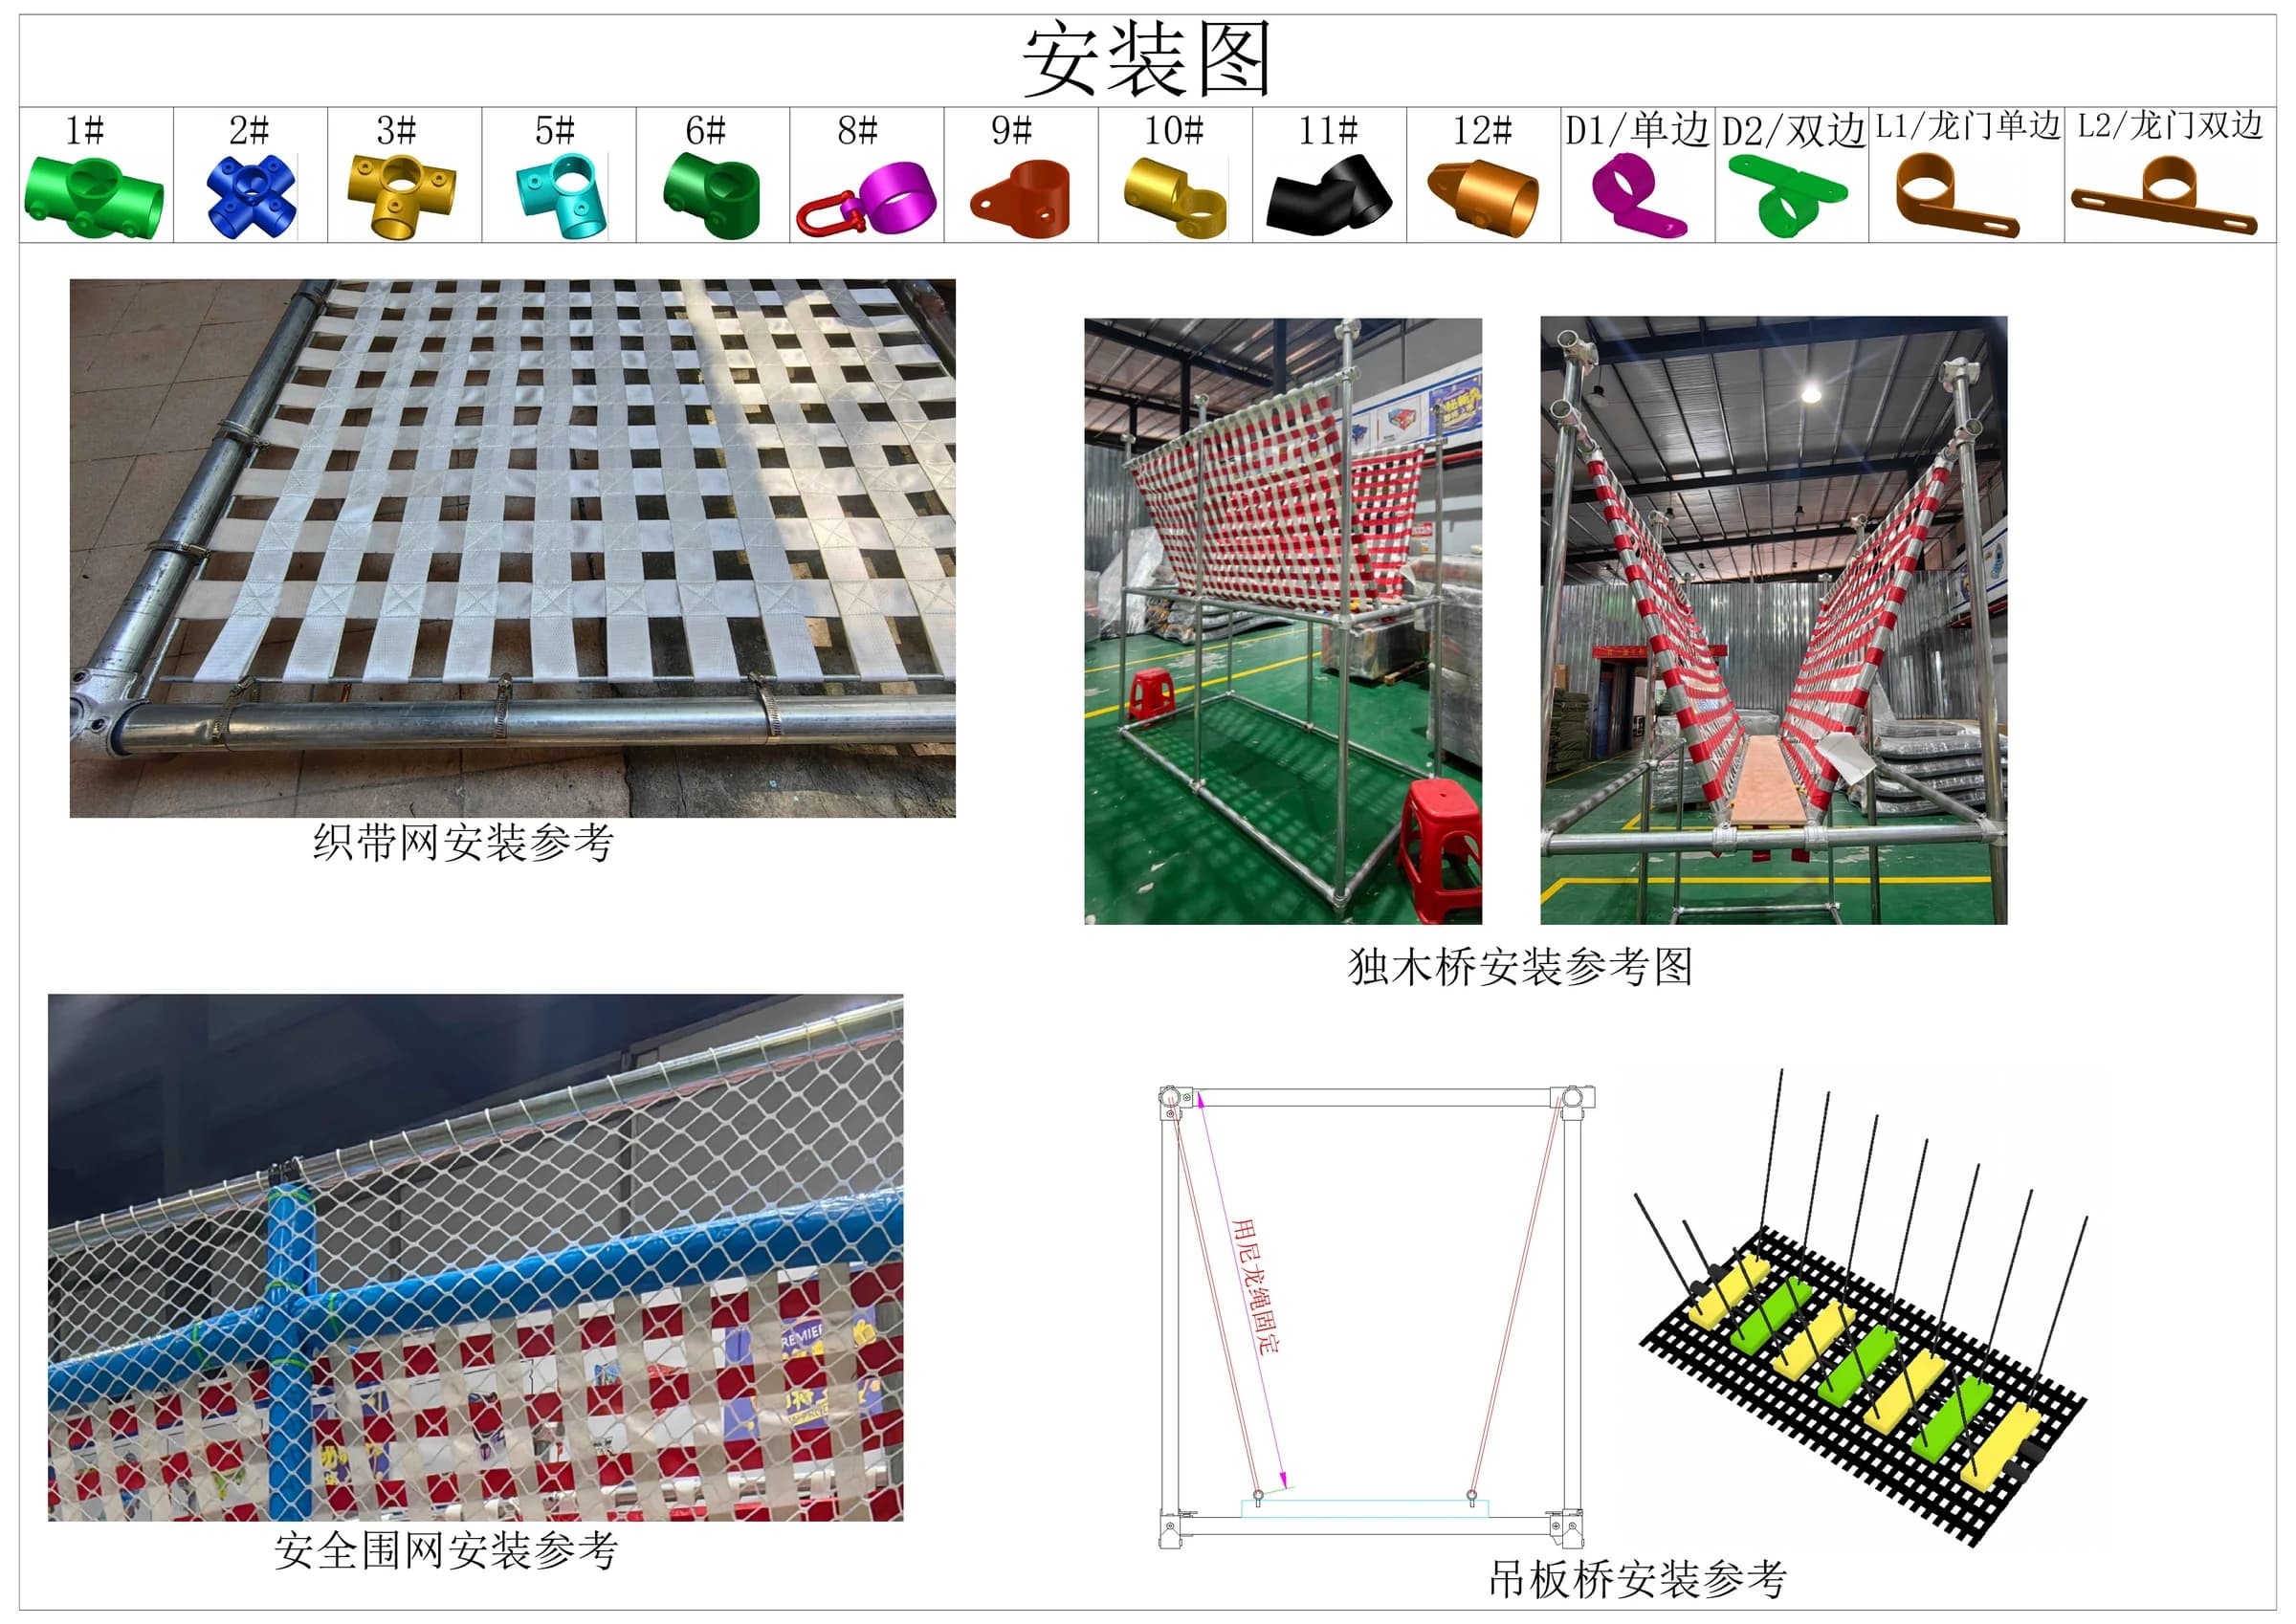
    • Install the woven platform net and perimeter safety net in the positions specified for the approved layout.
    • Use the manual references for the rope bridge and hanging bridge support arrangement.
    • Check openings, gaps and attachment areas before the installation stage is considered complete.
    • Complete any remaining accessories and protective work according to the approved project documents and agreed responsibility scope.
    indoor playground netting and bridge installation guide
    Real EPARK manual references for woven netting, perimeter safety net, rope bridge and hanging bridge elements.
Original EPARK project document

Indoor Playground Installation & Assembly Drawings

PDF · 20 pages · Chinese

Who Handles the Installation?

The installation approach is confirmed for each project before work begins.

EPARK-Supported Installation

EPARK can provide the agreed project drawings, document references and installation coordination. Optional on-site support must be confirmed in the quotation, order or contract.

Customer / Local Team Installation

A qualified local team may install the playground using the approved project documents, subject to the agreed responsibility scope and applicable local requirements.

Final installation scope, costs and responsibilities are controlled by the approved quotation, order and contract.

What Should Be Ready Before Installation?

Confirm these project inputs before the installation team begins work.

  • Usable Floor AreaThe installation zone is cleared and available.
  • Clear HeightThe confirmed clear height matches the approved layout.
  • Site AccessDelivery and installer access has been coordinated.
  • Floor ConditionThe floor condition is ready for the agreed work.
  • Approved LayoutThe latest approved playground layout is available.
  • Installation DocumentsThe correct project-specific files are on site.

Indoor Playground Installation FAQ

Clear answers about installation documents, local-team installation and project responsibility.

EPARK can provide project-specific installation drawings and installation coordination. The exact service scope is confirmed for each approved project.

A qualified local team may carry out the installation when this approach is agreed for the project. The team must follow the approved project documents and applicable local requirements.

Project-specific installation drawings can be supplied for the confirmed playground design. The drawings for one project must not be used for another configuration.

The available EPARK installation manual can be opened from the guide on this page. The complete project document set is confirmed with the approved order.

On-site support is not assumed to be included. Availability, travel, cost, scope and responsibilities must be stated in the approved quotation, order or contract.

Site access, the installation area, local personnel and any required tools or utilities should be coordinated before work begins. The approved project documents and agreed responsibility list remain the controlling references.

Need Help With Your Playground Installation?

Share your project requirements and approved layout with our team to discuss the installation support available for your project.

Indoor Playground Installation Services | EPARK